I haven't had time to blog in quite a while and
I truly miss it. People often ask me if I still cook and the answer to this
question is a resounding yes. Most days, I cannot not wait to get home from
work and into the kitchen. I spend my Saturday mornings in the kitchen, often
waking up way too early because I am busting to get started. It is a tiring
job, but yet so fulfilling.
If you know my personality, then you know I am a
creature of routine. I HATE change and disorganization. Everything has a place
and everything goes a certain way. My lists and excel spreadsheets would drive
most people mad, but it is how I keep track of life. I take the same approach
towards meal planning, grocery lists, budgets, etc. We are still following the
$60.00 a week grocery budget. Recently, I started planning our meals in 2 week
blocks. J.T. goes to the grocery store on Friday, as soon as school lets out. He
does better at the store than I used to do, always coming in under budget. I am
so grateful for his help. This leaves only the farmer's market to go to on
Saturday mornings and we are doing this every other week as well.
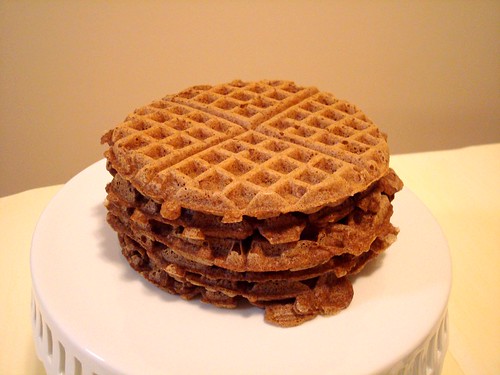
Waffles have become a weekly tradition at our
house, peanut butter waffles to be exact. We always have peanut butter waffles
and eggs on Friday night. I make the waffles and J.T. cooks the eggs because he
is the egg master. It is an easy, fun meal that both of us look forward to each
week. The meal is even better when the Braves are playing and they beat the
Dodgers. I always make the waffles in advance and freeze them. This makes them
easy to pull out, slather with peanut butter, top with another waffle, cut into
quarters and pop in the oven - crisp and gooey peanut butter waffle sandwiches.
The recipe listed below is for the waffles. Serve them with syrup or make the
peanut butter waffle sandwiches. They are great both ways!
Ingredients
· 2 cups multi grain gluten free flour blend
· 1 ½ teaspoons baking powder
· ¾ teaspoon baking soda
· ½ teaspoon celtic sea salt
· 1 ¾ cups unsweetened almond milk, at room
temperature
· ½ cup coconut oil, plus more for greasing the
waffle iron
· 1 tablespoon molasses
· 1 teaspoon vanilla
· 2 eggs, yolks and whites separated
Directions
1. Place a small glass or stainless steel mixing
bowl and two handheld mixer beaters into the freezer.
2. In a medium bowl, whisk together the flour,
baking powder, baking soda, and sea salt. Set aside. In a large
liquid measuring cup, whisk together the almond milk, coconut oil, molasses,
vanilla, and egg yolks. Pour the wet ingredients into the dry ingredients
and stir until just combined. The batter should still be lumpy.
3. Use a pastry brush to lightly grease a waffle
iron with coconut oil. Preheat the waffle iron to a medium high
temperature.
4. Remove the chilled bowl and beaters from the
freezer. Beat the egg whites on high speed, with a handheld electric
mixer until soft peaks form. Gently, fold the egg whites into the batter.
5. Ladle the batter into the preheated waffle iron
using a ½ cup measuring cup. Cook each waffle according the waffle iron
manufacturer’s instructions. Keep warm in a 200 degree oven if serving
immediately.
Make ahead: In a single layer, place as many waffles as you
can on a large baking sheet. Freeze for 1 hour. Remove the frozen
waffles from the baking sheet and stack in freezer safe plastic bags.
Repeat process. This freezing method helps the waffles retain their
shape. Freeze up to 3 months. Reheat in 375 degree oven for 10
minutes.
No comments:
Post a Comment