Showing posts with label J.T.. Show all posts

Thursday, August 28, 2014

Life Update

     Gosh, I don’t even know where to begin.  So much has changed (for the better!) since I last blogged and I am long overdue for an update.  Although no one may even read my blog (besides my Mama), I love to look back and see where I was at a certain point in life.  This blog holds the memories that seem to vanish quickly as I go about my day to day activities.  Four significant changes have taken place since May and I couldn’t be more grateful for all that has happened.  

  1. We have ZERO student loan debt!  When J.T. and I got married in 2012, he had accumulated around $80,000 worth of student loan debt.  This debt was mainly a snowball of accumulated interest on loans that were taken out to pay for his Bachelors, Masters, Education Specialist, and Doctorate.  We knew we wanted to attack the loans aggressively but didn’t get serious until May of 2013.  I sat down and devised a payment plan that allowed us to knock out $57,536.63 in 12 months.  Every Friday, we made loan payments, beginning with the loans holding the largest interest rate.  To say we have been living on a budget would be an understatement!  I literally tracked every penny that was spent (and still do).  We didn’t take trips, go out to eat, or spend money on anything that wasn’t absolutely necessary for survival.  I have learned more about money and budgeting in the last year than most people do in a lifetime.  The days of freezing in the winter, burning up in the summer, “Meatless” Monday 5 days a week, and quick showers are behind us, but I will never forget this experience.  To celebrate, J.T. and I went shopping to buy some items that were beyond needed - clothes, shoes, socks, underwear (ha!).  This debt was not paid off by our hard work alone, but rather by God’s constant financial blessings over our life.  Some month’s we didn’t think we would make our goal, and time and time again extra money showed up.  We are now saving for a house and couldn’t be more thrilled!  
  2. I got a new job!  I am still working for the same organization but have transferred to a different department and higher position.  Even applying for a different job was a difficult decision for me to make.  One of my best friend’s works in my old office and I miss seeing her daily.  Luckily, we have been able to talk on the phone a couple of times a week to catch up.  
  3. J.T. started his administration certificate.  Yes, you read that right.  After paying off a ton of student loan debt, he started back to school again.  The administration degree will allow him to become a principal, school board employee or even superintendent if he chooses.  This degree is something he has contemplated for quite some time and we are finally financially able.  He started this fall and will finish this summer.  While neither one of us are crazy about his week night classes or monthly Saturday class, it is worth the sacrifice.  Since I work at the school, he gets half price tuition and we are paying as it comes due - no loans or pulling money from savings.  The finished degree will result in a raise that will pay for the degree itself in a year.  Here’s to degree number 5!
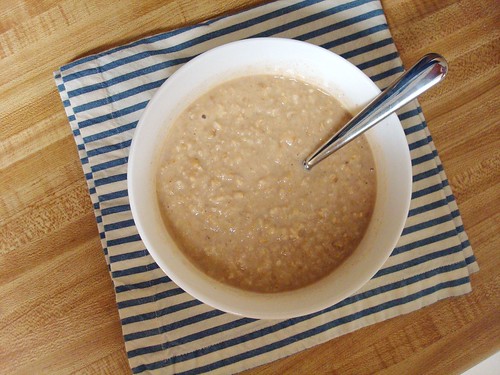
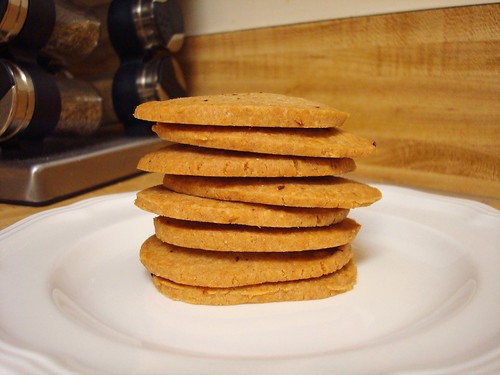
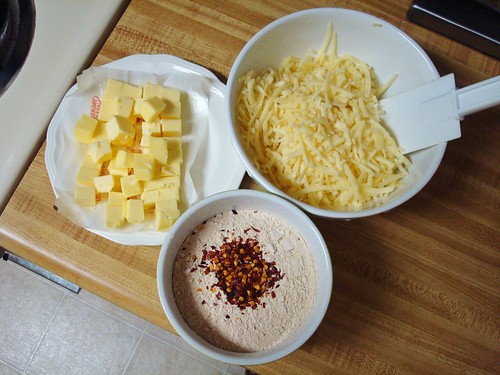
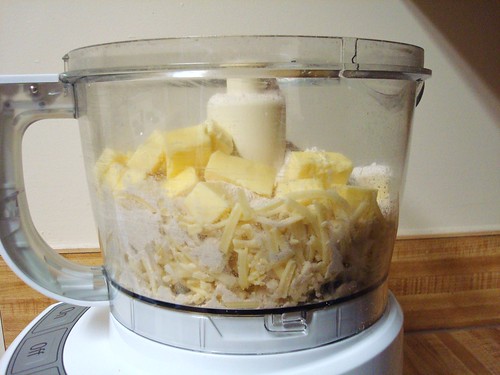
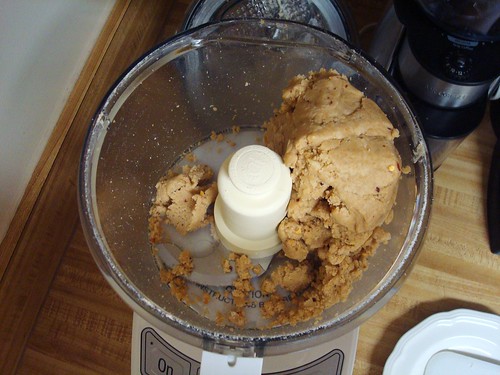
  4. We have gone paleo.  As much as I fought this current diet trend, I finally caved after shear desperation.  A few years ago, I started itching - no rash, no dry skin, and no doctor had a clue.  It got to the point where it was wreaking havoc on my daily life.  I was having difficulty showering or even wearing certain clothes without being miserable or in tears.  My brother’s mother-in-law is a doctor who is knowledgeable in holistic medicine.  Through her guidance, I have been placed on a paleo diet along with numerous supplements for nutritional deficiencies.  The nutritional deficiencies were confirmed via blood test at my last checkup.  As much as I hate to admit it, the paleo diet is working for me.  Many of you know I was gluten, dairy, and soy free before beginning the paleo diet, and restricting foods even more seemed daunting.  At the beginning of June I started an elimination diet which restricted grains, dairy, nuts, seeds, eggs, certain vegetables & fruits, and sugar.  I am surviving!  The first 30 days were a terrible struggle.  In June I itched for 23 days out of 30.  In July, I itched for 15 days out of 31.  In August, I have itched for 9 days out of the 28 that have occurred.  An unhealthy gut is the root of all sickness and I have embarked on a journey out of desperation to heal mine.  As much as I didn’t want to jump on the paleo band wagon, the diet plus supplementation has helped me tremendously.  I have struggled with health problems for years - hypothyroidism, secondary amenorrhea, IBS - and chronic itching was the final straw.  This new way of eating is expensive but if I don’t have my health, I have nothing.  My $60 grocery budget has flown out the window and I am slowly learning how to cook without grains.  I would love to one day eat a bowl of oatmeal, but if that comes at the cost of itching daily, I will remain grain free forever.  Time will tell.  
That’s enough changes for one day.  I hope you enjoyed a brief 3 month recap of our lives!


Wednesday, February 20, 2013

Brown Sugar & Cinnamon Instant Oatmeal

DSC08043


     A while ago, I got on my soapbox about milk and cereal being very pricy.  A gallon of Publix Greenwise organic milk retails for $5.99 and a 14 ounce box of Publix Greenwise organic toasted oats cereal costs $3.79.  J.T. likes big bowls of cereal and there is nothing tiny about the amount of milk he drowns his cereal in either.  Two boxes of cereal and a gallon of milk were costing $13.57 a week! This doesn’t include the ½ gallon of almond milk and container of oats I buy for my breakfast each week.  I talked to J.T. about possibly trying instant oatmeal.  As a kid, he wasn’t fond of oatmeal.  I am not sure any kid really is unless it is loaded with sugar and a bunch of other chemicals and additives, which are junk.  Once again, my Homemade Pantry cookbook came to the rescue!  I can attest that this oatmeal is delicious.  I sometimes eat a small bowl for a bedtime snack.  J.T. will actually eat this oatmeal and he enjoys it!  I was so relieved.  J.T. has cut his milk and cereal consumption in half.  This saves a little money that can be put toward other items which we really need at the store.  After being a cold cereal breakfast consumer for years, J.T. now rotates between cereal and this instant oatmeal recipe. I am thankful for a husband that is always willing to try new things J   

DSC07705DSC07709 DSC07710 DSC07712 DSC07713 DSC07714


Ingredients
·         6 cups old-fashioned rolled oats
·         ½ cup packed brown sugar
·         1 tablespoon cinnamon
·         1 teaspoon kosher salt

Directions
1.      Preheat the oven to 325 degrees and line a large baking sheet with parchment paper.  Spread the oats out in an even layer on the prepared baking sheet.  Bake in the oven for 20 minutes.  Set aside to cool slightly.
2.      In a food processor, fitted with a steel blade, pulse together the brown sugar, cinnamon, salt, and 4 cups of the baked oats.  Pulse the mixture until it is a powdery consistency.  Mix together the pulsed oats and the remaining baked oats.  Store in a large airtight container for up to a month.  To make the instant oatmeal, combine ½ cup of oats with 1 to 1 ½ cups of water (for thicker oatmeal add less water and for thinner oatmeal add more water).  Microwave on high for 2 to 2 ½ minutes (mine takes exactly 2 minutes and 15 secondsJ).   Add a splash of milk and serve hot.  Yields 12 to 15 servings.  

Wednesday, February 13, 2013

Whole Wheat Crackers

DSC07764

     Wheat crackers, second only to the cheese crackers, are J.T.’s other favorite snack.  This recipe is adapted from my beloved Homemade Pantry cookbook, which I am still ecstatic about!  I realize that many of you are probably thinking “who in the world has time to make crackers?” My answer to this would be that Saturday and Sunday are usually a baking and cooking marathon around our house.  I also love to make double and even triple recipes of staple items.  For example, this is a double recipe of the original version published in The Homemade Pantry.  It yields approximately 140 crackers, which is about a month’s worth of cracker snacks for J.T.  He eats the cheese crackers for a snack in the morning and the wheat crackers for an afternoon treat.  I was making Homemade Wheat Thins, but after I made a batch of these wheat crackers, he was hooked.   I also LOVE this recipe because the baked crackers can be frozen.  One Saturday a month, I gather all my ingredients and get to work.  For the remainder of the month, I pull from the freezer how many crackers I need for the pantry during the upcoming week.  Then, I recrisp the crackers in the oven for 3 minutes and I’m done.  It’s that easy.  

DSC07736 DSC07737 DSC07741 DSC07740 DSC07742 DSC07744 DSC07745 DSC07747 DSC07751 DSC07749 DSC07752


Ingredients
·         4 cups King Arthur whole white wheat flour
·         1 teaspoon baking powder
·         2/3 cup whole millet, uncooked
·         2/3 cup ground flaxseeds
·         1 teaspoon kosher salt, plus more for sprinkling
·         5 garlic cloves, minced with a garlic press
·         2 teaspoons dried rosemary, crumbled
·         1 cup plus 4 tablespoons extra virgin olive oil
·         Freshly ground black pepper, from a pepper mill

Directions
1.      In the bowl of a mixer, fitted with a paddle attachment, mix together the flour, baking powder, millet, flaxseeds, salt, garlic, and rosemary.  With the mixer on low speed, slowly stream in the olive oil.  Then stream in (very slowly once again) 1 ½ cups of water, until the dough comes together.  The dough should be very easy to work with.  Dump the dough onto a floured surface and roll it out with a rolling pin to ¼ inch thickness.  Use a 1 ½ inch biscuit cutter to cut out the crackers.  Repeat this process until all the dough is used. 
2.      Line the cut out cracker dough on ungreased cookie sheets.  Not much space is required between each cracker because they do not spread.  Sprinkle with kosher salt and freshly ground black pepper.  Bake in a 350 degree oven for 18 to 20 minutes (20 minutes was perfect for my oven).  Once the crackers have baked, transfer them to a wire rack to cool completely before storing.  These can be stored in an airtight container for up to one week.  As I mentioned earlier, my FAVORITE thing about these crackers is that they can be frozen!  Store them in a Ziploc bag or freezer safe container in the freezer (up to 3 months).  Simply recrisp them for 3 minutes in a 375 degree oven.  Yields about 140 crackers. 

Wednesday, January 30, 2013

J.T.’s Cheese Crackers

DSC07931

     These are J.T.’s favorite crackers and he eats them every day as a mid-morning snack.  When we first started the real food challenge, I assumed that crackers and cereal would be my biggest obstacles to recreate in the kitchen.  I was right.  Dozens and dozens of these cheese crackers have been produced in my kitchen and it took many, many batches before I finally created the perfect consistency and flavor for J.T.  His favorite store bought crackers are Hot & Spicy Cheez-It’s, so I was attempting to make something that was similar.  These cheese crackers are very easy to make, but I always have a game plan when it comes to making my life simple.  There are four ingredients in these cheese crackers and everything revolves around the cheese.  I solely purchase Cabot Cheese, because our store does not sell Organic Valley cheese and this is the next best option.  Cabot is farmer owned and operated and produces high quality products.  About once a month Publix runs an 8 ounce block of Cabot cheese on sale for $2.50.  This sale normally lasts two weeks and I purchase one or two blocks each week.  The next three ingredients rarely ever go on sale, so I just bite the bullet and purchase these whenever there’s room in my budget.  Once I have all my ingredients together, I get to work and double the recipe listed below.  This gives me four cracker logs, or enough for four weeks.  Every weekend I defrost a log, slice, and bake.  It literally takes less than ten minutes.  On Saturday, I wrote about purchasing these containers.  The crackers fit perfectly and I will be ordering another set soon.  I divide the 24 crackers into six individual portions, and every morning before work one gets popped into J.T.’s lunch bag.  I have a confession.  I feel as though I have been holding back some of my most frequently made recipes.  This post will begin a mini-series of pantry staples that I make week in and week out.  Next week’s topic is cereal, so stay tuned! 

DSC07720 DSC07724 DSC07726 DSC07728 DSC07729 DSC07730 DSC07731 DSC07733 DSC07924 DSC07925 DSC07926 DSC07930


Ingredients
·         2 cups whole wheat flour, preferably King Arthur
·         1 (8 oz.) block Cabot Vermont sharp cheddar cheese, shredded
·         10 tablespoons cold unsalted butter, diced into cubes
·         1 teaspoon crushed red pepper flakes (decrease or omit for less heat)

Directions
1.      Place the flour, cheese, butter and crushed red pepper flakes into a food processor.  Pulse until the dough comes together into a ball.  Dump the dough onto a pastry mat or dough board and shape into a round disk.  Use a knife to divide the dough in half.  Roll each half into a log that is approximately 9 inches long (if freezing for later, 9 inches fits perfectly into a Ziploc bag).   
2.      Slice each log into 24 cracker rounds.  I use a ramekin to flatten each cracker slightly.  Be sure to lay a piece parchment or saran wrap over the dough before pressing down with the ramekin.  Place the sliced cracker dough onto an ungreased baking sheet.  Bake for exactly 15 minutes at 375 degrees.  Remove the baked crackers to a wire rack and cool completely.  Store in an airtight container for up to one week.  Yields 48 crackers. 
Note:  These crackers freeze beautifully.  Each dough log can be wrapped in saran wrap and placed in a Ziploc bag.  Be sure to defrost the dough overnight in the refrigerator before baking.  I set mine out of the refrigerator for a few hours before I bake it.  The dough is much easier to slice at room temperature.